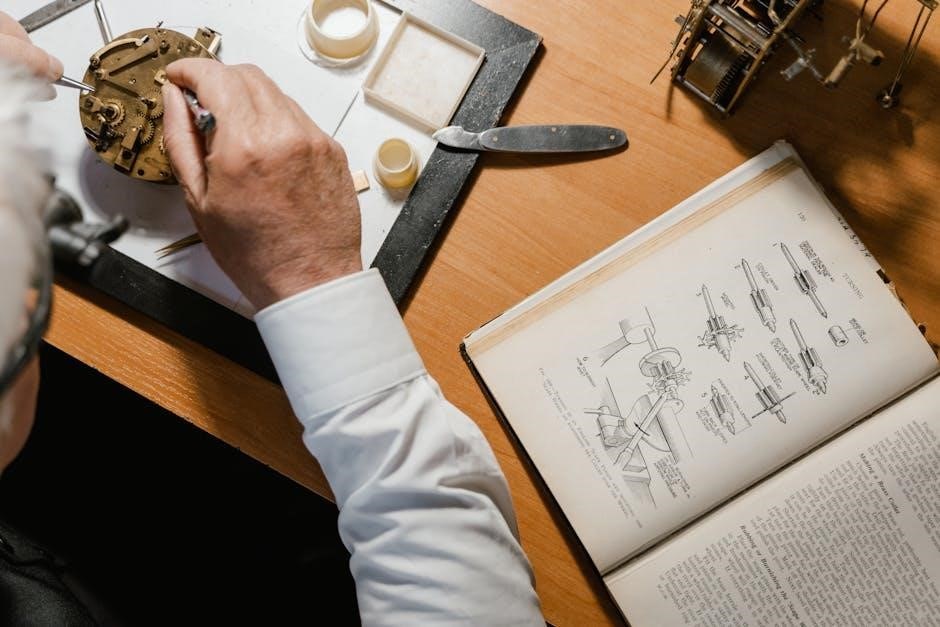
Graco Pump Repair Kit Instructions: A Comprehensive Guide
Navigating Graco pump maintenance demands precision; this guide details repair kits, model identification, troubleshooting, safety, and step-by-step procedures for optimal performance․
Understanding Graco Pump Repair Kits
Graco pump repair kits are meticulously assembled packages designed to restore functionality to specific pump models, offering a cost-effective alternative to full pump replacement․ These kits typically contain essential components prone to wear and tear, such as seals, O-rings (like A-63-19A), and potentially diaphragms or valve seats․
Understanding the kit’s compatibility with your Graco pump is paramount․ Kits are categorized by pump type – Check-Mate (60cc & 100cc), Merkur Bellows, or Xtreme – and often, specific displacement or model numbers (e․g․, 406891L, XP Xtreme 180cc)․ Utilizing the correct kit ensures proper fit and performance․ Genuine Graco parts, like those found in kit 233837 for Merkur Air Motors, guarantee quality and reliability, referencing manuals like 309462 for detailed guidance․
Identifying Your Graco Pump Model
Accurate pump model identification is crucial for selecting the correct repair kit and accessing relevant documentation․ Locate the pump’s data plate, typically affixed to the pump housing․ This plate displays a unique model number – essential for ordering parts and downloading the appropriate repair manual (e․g․, 312467H for Check-Mate 100cc)․
Referencing Graco’s online resources or contacting their customer support with the model number will confirm compatibility․ Pay attention to displacement (60cc, 100cc, 180cc) as this impacts kit selection․ Repair parts listings often use part numbers like 312889E for Check-Mate 60cc kits․ Correct identification avoids ordering incorrect components, saving time and ensuring a successful repair․ Detailed parts breakdowns are available in Graco’s comprehensive catalogs, containing 776 pages and 24MB of information․
Common Graco Pump Problems & When to Repair
Recognizing pump issues early prevents extensive damage․ Common problems include inconsistent spray patterns, reduced flow rate, leaks (often requiring seal replacement – utilizing kits like 233837), and unusual noises․ A failing pump can stem from worn seals (A-63-19A O-ring), clogged filters, or air entering the system․
Repair is advisable when these symptoms appear, rather than continuing operation which could worsen the issue․ Specifically, address coupler issues with kits like 406843A (Merkur Bellows Pumps)․ If the pump fails to prime or maintain pressure, a repair kit is likely needed․ Graco offers warranty support; verified defects result in free part replacement․ Proactive maintenance, guided by repair manuals, extends pump life and minimizes downtime․
Safety Precautions Before Starting Repair
Prioritize safety during all repair procedures․ Always disconnect the pump from the power source and relieve all pressure before disassembly․ Wear appropriate personal protective equipment (PPE), including safety glasses and gloves, to prevent contact with fluids and moving parts․
Work in a well-ventilated area, as some fluids may emit harmful vapors․ Be mindful of potential hazards associated with flammable materials․ Consult the relevant repair manual (e․g․, 312467H) for specific safety warnings related to your Graco pump model․ Ensure proper grounding to prevent electrical shock․ Adhere strictly to torque specifications (115-135 ft-lb / 155-182 Nm) during reassembly to avoid component failure and maintain operational safety․
Repair Kit Contents & Component Identification
Kits contain essential parts like seals (A-63-19A) and O-rings (233837); understanding part numbers (312889E) is crucial for correct component usage and repair․
Decoding Graco Part Numbers (e․g․, 312889E)
Graco part numbers are meticulously structured to convey vital information about the component․ Understanding this system is paramount for accurate repair kit selection and ordering․ The number itself isn’t random; it’s a coded identifier․ For example, 312889E designates a specific ‘Repair Parts for Check-Mate 60cc Displacement Pumps, Repair Kit’․
The initial digits often indicate the component group or assembly․ Subsequent numbers pinpoint the specific part within that group․ The final letter, like ‘E’ in 312889E, typically denotes a revision level or engineering change․ This signifies updates or improvements to the original design․ Always verify you have the correct revision level for compatibility․ Referencing repair manuals (like 312467H) is crucial for cross-referencing part numbers and ensuring accurate identification, preventing incorrect replacements and ensuring a successful repair․
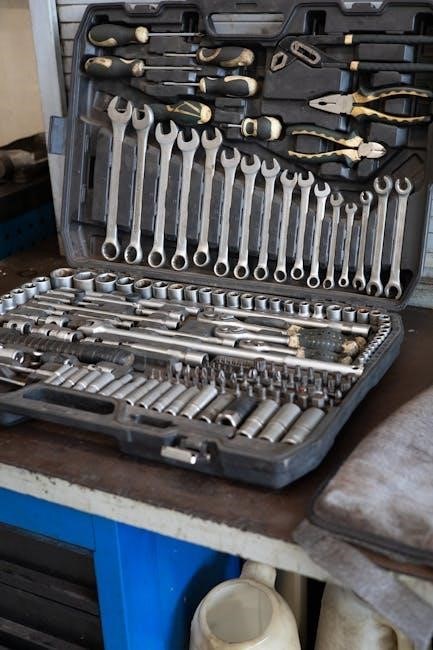
Essential Tools Required for Repair
Successfully repairing a Graco pump necessitates a specific toolkit beyond basic hand tools․ Essential items include a set of both standard and metric wrenches, sockets, and screwdrivers to accommodate various fittings and fasteners․ Torque wrenches are critical, particularly when referencing specifications like 115-135 ft-lb (155-182 Nm) for secure reassembly․
Specialized tools often prove invaluable․ These may encompass seal pullers for removing stubborn O-rings (like A-63-19A), pin punches for disassembling components, and potentially, a Graco-specific wrench for certain pump models․ Protective eyewear is non-negotiable, alongside nitrile gloves to safeguard against solvents and chemicals․ Having a clean workspace and appropriate containers for parts organization will streamline the process and prevent loss of small components during disassembly and reassembly․
Locating and Downloading Repair Manuals (e․g․, 312467H)
Accessing the correct repair manual is paramount for a successful Graco pump overhaul․ Graco provides downloadable manuals, often referenced by a specific part number like 312467H (for Check-Mate 100cc pumps)․ Begin your search on the official Graco website, utilizing the pump’s model number or associated repair kit number (e․g․, 312889E)․
Alternatively, numerous online resources archive Graco documentation․ Be cautious of unofficial sources and prioritize Graco’s official website for accuracy․ Manuals detail exploded views, parts lists, torque specifications, and step-by-step procedures․ Some manuals, like those accompanying Merkur bellows pump kits (406843A, 406862A), may include instructions in multiple languages, including Russian, so ensure you select the English version․ A readily available manual minimizes errors and ensures a safe, effective repair․

Step-by-Step Repair Instructions ⎻ General Procedure
Begin by safely disassembling the pump, meticulously inspecting components like seals and O-rings (A-63-19A), then replace worn parts using kit components (233837)․
Disassembly of the Graco Pump
Prior to disassembly, ensure the pump is depressurized and disconnected from any power source․ Carefully remove the inlet and outlet hoses, capturing any residual fluid responsibly․ Begin loosening the bolts securing the pump head, noting their positions for reassembly․ Gently separate the pump head from the air motor, taking care not to damage any internal components․
Next, systematically dismantle the fluid section, paying close attention to the arrangement of seals, O-rings, and valves․ Document each step with photographs or sketches to aid in reassembly․ Remove the piston or diaphragm assembly, inspecting it for wear or damage․ Be mindful of small parts, organizing them to prevent loss․ Refer to the specific repair manual (e․g․, 312467H) for your Graco pump model for detailed instructions and diagrams, as procedures vary significantly between pump types․
Inspection of Pump Components (e․g․, Seals, O-rings ⎯ A-63-19A)
Thorough inspection is crucial for identifying the root cause of pump failure․ Begin with seals and O-rings (like A-63-19A), checking for cracks, hardening, or deformation․ Examine the piston or diaphragm for wear, tears, or swelling․ Inspect valve seats and balls for pitting or corrosion, ensuring proper sealing․

Carefully assess the pump body and head for any signs of damage, such as cracks or erosion․ Check the push rod (A-43-A) for bends or wear․ Look for worn or broken springs (A-45)․ Pay attention to the coupler (406843A) and overflow chamber (406862A) in Merkur pumps․ Replace any component exhibiting signs of wear or damage, utilizing parts from your repair kit (233837)․ Document all findings to inform the repair process and prevent future issues․
Replacing Worn Parts (Using Repair Kit Components ⎯ 233837)
Utilize your Graco repair kit (233837) to replace all identified damaged components․ Begin with seals and O-rings, ensuring proper lubrication during installation․ Carefully seat new valve balls and seats, verifying smooth operation․ Replace worn pistons, diaphragms, and springs, referencing the repair manual (312467H) for correct orientation․
When working with Merkur pumps, install the new coupler kit (406843A) and overflow chamber kit (406862A) according to instructions․ For Xtreme pumps (406891L), ensure correct installation of all internal parts․ Always refer to torque specifications (115-135 ft-lb / 155-182 Nm) during reassembly․ Double-check all connections and ensure proper alignment before proceeding to post-repair testing․ Genuine Graco parts guarantee optimal performance․

Specific Repair Procedures by Pump Type
Detailed instructions are provided for Check-Mate, Merkur, and Xtreme pumps; each section outlines unique disassembly, repair, and reassembly steps for optimal results․
Check-Mate Pump Repair (60cc & 100cc Displacement)
Repairing Check-Mate pumps (60cc & 100cc) involves a systematic approach․ Begin by referencing repair parts manuals 312889E and 312467H for exploded views and component lists․ Disassembly requires careful attention to seal and O-ring locations․ Inspect worn parts, specifically focusing on the fluid passages and valve seats․ Utilize the appropriate repair kit, ensuring compatibility with your pump’s displacement․
Pay close attention to proper reassembly, lubricating components as needed․ Verify correct installation of seals (like A-63-19A) to prevent leaks․ After reassembly, prime the pump thoroughly before testing․ Common issues include air entrapment and reduced flow, often stemming from improperly seated valves or damaged seals․ Always consult the full Graco manual for detailed torque specifications and safety guidelines during this process․
Merkur Bellows Pump Repair (Coupler & Overflow Chamber ⎯ 406843A, 406862A)
Merkur bellows pump repair often centers on the coupler and overflow chamber․ Utilize kits 406843A (coupler) and 406862A (overflow chamber) for targeted fixes․ Disassembly requires careful attention to the bellows assembly and associated seals․ Inspect the coupler for cracks or wear, and the overflow chamber for obstructions․ Replace any damaged components with parts from the repair kit, ensuring proper fit and alignment․
Pay particular attention to the bellows’ seating surfaces, cleaning them thoroughly before reassembly․ Proper installation of the overflow chamber is crucial for maintaining consistent pressure․ Refer to Graco documentation for specific instructions and warnings․ After repair, test for leaks and proper bellows function․ Remember to consult the complete manual (potentially containing Russian sections – MM 311512В) for comprehensive guidance․
Xtreme Pump Repair (406891L & XP Xtreme 180cc)
Repairing Graco Xtreme pumps (406891L & XP Xtreme 180cc) demands a methodical approach․ Begin by accessing the appropriate repair parts documentation․ Focus on seal replacement using kit 233837, compatible with part number 245354 Merkur Air Motor – referencing manual 309462․ Thoroughly inspect all internal components for wear or damage, paying close attention to the piston and cylinder assembly․
Ensure proper lubrication during reassembly․ Critical torque specifications are 115-135 ft-lb (155-182 Nm) – adhere to these precisely․ After completing the repair, conduct a comprehensive operational test to verify proper function and identify any remaining issues․ Always prioritize safety and consult the official Graco repair manual for detailed instructions and warnings․ Genuine Graco parts are recommended for optimal performance and longevity․

Post-Repair Checks & Testing
Verify proper functionality post-repair; torque to specifications, prime the pump, and meticulously test for operational issues, ensuring optimal and reliable performance․
Torque Specifications (e․g․, 115-135 ft-lb / 155-182 Nm)
Maintaining precise torque is crucial during Graco pump repair to ensure component integrity and prevent future failures․ Refer to the specific repair manual (like 309462) for your pump model, as specifications vary significantly․ For instance, certain connections require tightening to 115-135 ft-lb (or 155-182 Nm) to achieve a secure and leak-proof seal․
Under-torquing can lead to loosening and potential fluid leaks, while over-torquing risks damaging threads or components․ Always use a calibrated torque wrench and follow the recommended sequence․ Ignoring these specifications can void warranties and compromise pump performance․ Genuine Graco parts, detailed in repair kits like 233837, are designed to function optimally within these torque ranges․
Pump Priming and Operational Testing
Post-repair, proper priming is essential for restoring Graco pump functionality․ Begin by ensuring all connections are secure and leak-free after applying specified torque values․ Slowly introduce fluid into the pump intake, following the manufacturer’s guidelines for your specific model – referencing manuals like 312467H is vital․
Operate the pump at low pressure initially, gradually increasing it while monitoring for any irregularities, such as unusual noises, vibrations, or leaks․ Check the flow rate and spray pattern to confirm consistent performance․ If issues persist, re-inspect connections and components․ Thorough testing, utilizing repair kits like 312889E components, validates successful repair and prevents premature failure․
Troubleshooting Common Issues After Repair
Despite careful repair using kits like 233837, some issues may arise․ Pulsating flow often indicates air in the system; re-prime the pump and check intake lines for leaks․ Reduced pressure could stem from worn seals (A-63-19A) or a faulty air motor – referencing repair manuals (309462) is crucial․
If the pump fails to start, verify power supply and air pressure․ Unusual noises might signal improperly installed components or internal damage․ Always double-check torque specifications (115-135 ft-lb / 155-182 Nm) and consult exploded views for correct part placement․ For complex problems, contacting Graco support or a qualified technician is recommended to avoid further complications․